
Honeycomb Paint Organizer
0
 Total Cost

- Less than $10
Materials
- PVC Pipe
- PVC Glue
Tools (use what you have)
- Saw
- Miter Saw and Miter Box
- Jig and Jig Clamp – (to make measuring easier and faster)
- Electric Sander with various grit papers
Optional Supplies
- Sandable Primer
- Spray Paint / Various Acrylic Paint
Prep-work
- Make sure when you choose your PVC pipe you take a couple bottles of your paint along to the hardware store to make sure your paint will slide into and out of the end of the pipe before you purchase. I bought a length about 10 ft. long as it was cheaper than buying shorter lengths. I spend about $5 on the PVC pipe.
- Cut the pipe into 2 inch lengths you will need at least 19 sections of pipe (more if you need more spaces). I used a Miter saw and Miter box with a jig because it is what I have around the shop. This is a very time consuming process to cut these lengths by hand this way. I suggest if you want to only spend an hour or two on the entire project (and not have sore arms afterward), use a band saw or some other powered cutting tool. Also because I didn’t want to pre-measure 10 ft. of pipe into 2″ lengths I used a simple jig.
- How the jig works: The way the jig works is basically a scrap piece of wood clamped down to create a stop. What I did is figured out where 2 inches of pipe would fall under the blade and then clamped the block of wood down. I would then slide the pipe up to the block firmly butting it up against the wood. When I started to cut it would always be 2″. After making my cut I would just move the pipe forward to the jig and begin cutting the next section.
Assembly – First Ring

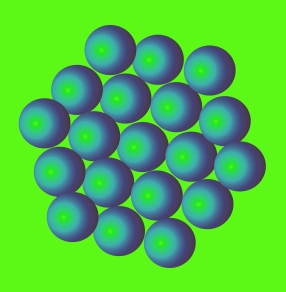
- Starting with the center circle in the image (right) arrange your PVC in the above shape. Dry fit (no glue yet!) all your pieces checking for fit and to see where all the pipe edges will touch each other. I laid mine out on a cardboard banker’s box lid so I could move the entire project out of the way while it was drying. Also because I was going to glop glue every where I didn’t want the extra clean up.
- Once you have your layout figured out you can start to glue the pieces together with PVC glue. Make sure you follow the directions on the bottle of glue this is a caustic glue that needs to be used in a well ventilated area. Because you don’t need a water- or air-tight seal don’t bother using PVC cleaner. It’s just an extra unnecessary step that you don’t have to do.
- Starting from the center circle in the image above, glop glue on both pieces where they will touch. Press and hold the pieces together for about 20 seconds and proceed to the next touching circle always making sure to put glue in every spot where two pieces touch. Every time you glue a piece hold it together for about 20 seconds to ensure it sticks (what PVC glue does is melt the plastic. So in effect what you are doing is welding plastic.) Pretty neat huh?!?
Assembly – Second Ring
- So once you have the first ring entirely glued, you can start on the second ring. Glue as the steps above, but now all your pieces will be touching at least 3 – 4 other pieces when you glue them together. At this point I was pretty much glopping glue about 3/4 of the way around the piece I was trying to fit into place.
- Once all your pieces are glued and in place allow the entire piece to dry for the recommended time from the container of glue.
Finishing
- Once your assembly is dry you will want to sand any rough spots and also to make sure the front and the back of the piece are level. You can accomplish this by using an electric sander or using a large enough band saw to trim away the extra and then sanding your cut areas smooth again.
- In a well ventilated area follow the directions on your can of spray primer and spray the entire hexagon with an even coat. Allow your primer coat to dry and sand if needed.
- Using a honey-gold color paint spray paint the entire honeycomb with a couple coats of paint inside and out. Once that is dry you can go back in with a gold-brown paint and paint the outside edges of each “chamber” and the entire outside edge of the hexagon. Alternately, you could paint the entire assembly as above, but with different colors to match your room.
- Your project is now ready for filling! Slide your paint containers into each section and arrange in a pleasing way.
